

GNO is a multitasking environment for Apple IIGS computers. Back when it was in development, Apple engineers and Developer Technical Support personnel insisted it couldn’t be done. Procyon Enterprises, the original developers of GNO, proved them wrong, and released GNO 1.0 back in the mid-1990s.
Fast forward to the present. GNO 2.0.6 is the latest version, and it’s now freeware, with a larger and more diverse group of people working on the codebase. You can download the latest version of GNO from the GNO Consortium web site at http://www.gno.org.
This article isn’t intended to serve as a total reference to GNO—for that, you can find all the information you need on the GNO web site. Instead, it’s just a look at the installation process and the initial setup of the GNO environment. A2Central.com will in the future have additional articles about GNO.
The instructions that come with GNO include information on extra steps you need to follow if you want to do nonstandard installs (such as using different names for the hard disk partitions involved). I’m going to assume you want a standard install—which most people will—to cut down on the risk of getting confused while installing the software.
The Download
There are a lot of files: 18, to be exact. 17 of them are unpacked automatically by the GNO installation process. The 18th is an archive of files that must be unpacked to an 800 KB disk (or RAM disk). These files serve as a very basic GNO environment that’s got just enough stuff to handle installing the complete system.
Once you’ve downloaded the files, you should unpack the gnoboot.shk archive to an 800 KB disk or RAM disk. Once that’s done, you should see, in Finder, something like this:

Starting the Install
Make sure you have a 32 MB ProDOS partition called “gno” and an HFS partition (it can be just about any size, it doesn’t need to be very big) called “gno-hfs”.
The first step is to double-click the “kern” program on the gno.boot disk.
It’s absolutely critical that the disk you just unpacked the gnoboot.shk archive onto is named gno.boot; if not, the install won’t work.
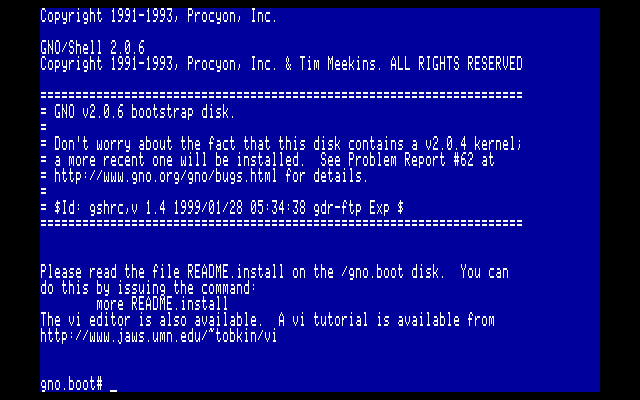
This screen, which displays some informational material and leaves you in GNO’s gsh shell (in Unix-speak, a shell is a command-line environment), advises you to read the README.install file, and tells you to use the command more README.install to do so.
These instructions remind you to make sure you have the two aforementioned partitions (“gno” and “gno-hfs”), and then begin to list the steps for installing GNO.
The first step is to tell the system where the downloaded GNO installer archives are (gnohfs.shk, gno.01.shk, etc). In my case, they’re on a disk partition named “GNOfiles”, but you may have them somewhere else. You use the setenv command to do this:
setenv DOWNLOAD_DIR /GNOfilesBe sure you use slashes as separators between levels of directories in the pathname instead of colons, and don’t add a trailing slash. The install scripts aren’t very fault-tolerant about these things.
Set the current working directory to the location at which you want to install GNO:
cd /gnoNow you can begin installing the main portion of the GNO system by running the install script:
/gno.boot/installboot1This will percolate for quite a while, unpacking the gno.*.shk archives onto your /gno disk.
There are some additional files that have longer file names that must be installed onto an HFS disk; that’s why you have the “gno-hfs” partition. To install those items, set the current working directory to the disk on which you want to install:
cd /gno-hfsThen run the second installer script:
/gno.boot/installboot2This only takes a relatively short period of time to complete.
The README.install file goes on at this point to talk about editing the namespace file. This is only necessary if you didn’t use the default names for your GNO partitions (“gno” and “gno-hfs”). Since we’re using those names, we’re fine; you can skip that step.
A number of extensions, desk accessories, and drivers have been installed in various subdirectories at /gno/System. These should be copied into the System folder on your boot disk, like this:
cp /gno/system/desk.accs/* */system/desk.accs
cp /gno/system/drivers/* */system/drivers
cp /gno/system/system.setup/* */system/system.setup
Finally, link the manpages (manual pages) using these commands:
cd /gno/usr/man
mkso -v -H /gno-hfs/man mkso.data
Then you can exit the GNO installer environment using the exitcommand. This will return you to your program launcher (such as the Finder).
Before You Start GNO
You should use a utility like ProSEL to rearrange the files in the System/System.Setup folder on your boot disk to ensure that GNOBug appears before GSBug (usually called “debug.init”) in that directory.
In ProSEL, choose the Utilities option from the main menu, then Sort Directory from the next screen. Type in the pathname of your boot disk’s System/System.Setup directory; this will get you a screen similar to the following:

As directed, use the Apple-arrow keys to move the GNOBug extension to the top of the list:

Then you simply hit return to lock in the changes. You’ll have to reboot after doing this; ProSEL will do it automatically.
Your GNO installation is now complete.
Starting GNO
After you’ve finished rebooting, you can start up the GNO environment by launching kern on the /gno disk. This will start up the environment, which now needs some configuration work.
You’ll be asked to log in. Use the username “root”. There’s no password, so it won’t ask you for one. This is one of the first things you should fix. Type passwd and hit return. It’ll prompt you for your new password twice. The next time you start up GNO, you’ll need to use that password if you’re logging in as root.
If you want to change the message of the day that appears when you first start up GNO, you can edit the /etc/motd file. The only editor included with the standard GNO installation is vi, which is horrifyingly hard to use, but it does the job. I’m not even going to get into talking about how to use vi, because it’s way beyond the scope of this article. You can get instructions on using vi at http://www.jaws.umn.edu/~tobkin/vi.
GNO programs are typically located in the /bin, /sbin, /usr/bin, and /usr/sbin directories. You can get instructions on what they do using the man command. For example, to get information about the cd command, you can do man cd.
Type ls to see a list of the files in the current working directory; this directory should be the root (system administrator) user’s home directory. There should be one file, gshrc. This file is a script of gsh shell commands that get run automatically when root logs in. Every user’s home directory should have a gshrc file like this.
This file is generic for all users, and includes settings for the directories in which the shell will search for programs when you type their names to run them, the shell’s prompt, and so forth. The root user will often need to access programs in some directories that aren’t included in the default path, so you might want to edit the gshrc file using vi. Change the “set path” line to include “/usr/sbin” and “/sbin” between the quotes.
Adding Users
Adding new users to GNO can be done by editing the /etc/passwd file. There’s a newuser utility, but it doesn’t currently work. Each line in this file defines one user, and has several fields, separated by colons. Add a line to this file in the following format:
username::uid:gid:Real Name:homedirectory:shellReplace username with the user’s login name. If you’re adding a user Eric Shepherd who wants the username “sheppy”, you would put “sheppy” here. The next field, which you should initially leave blank, is that user’s password. You’ll use the passwd utility to set this later, since it has to be encrypted in the /etc/passwd file.
uid and gid are the user’s group and user IDs. Each user needs a unique user ID number. The group ID is the group of users the user belongs to. The group ID isn’t very useful in GNO, since there isn’t really any security to speak of. “Real Name” should be the user’s real name; in this case, “Eric Shepherd”.
homedirectory should be the pathname of the user’s home directory. This will usually be /home/(username), so in this case, it would be /home/sheppy. Be sure to create this directory after you’ve edited the /etc/passwd file.
shell should be the pathname of the shell the user should be put into when they log in. Under GNO, this should be /bin/gsh.
After you’ve edited the /etc/passwd file, use the passwd utility to set the new user’s password: passwd username, for example:
passwd sheppyThis will prompt for the user’s new password, twice, and set it.
Finally, create the user’s home directory, which, again, should be at /home/username:
mkdir /home/sheppyThe new user has been created. If you log out of gsh using the exitcommand, you can log back in as the new user. The new user can then use the passwd command, if they wish, to change their password, edit their gshrc file, and so forth to customize their own setup.
Security
There isn’t any. Although GNO looks and acts an awful lot like Unix, you have to keep in mind that it’s just an environment running on top of GS/OS, which has no provisions for any kind of security. Users have access to each other’s files, and can tamper with the system files. So don’t expect to use your GNO passwords to lock anyone out of secret data.
Installing Programs
When you install new GNO utilities and software, you’ll usually put it in the /usr/local/bin directory. The /usr/local tree is generally used for items installed specifically by the local system administrator (that’s you).
Conclusion
At this point you should have a basic GNO installation up and running. The GNO Consortium web site has information—and software—that you may find useful, so check it out.
Future A2Central.com articles will cover more of the interesting and useful things you can do with GNO.